
A Kiwi EV · 7 November 07
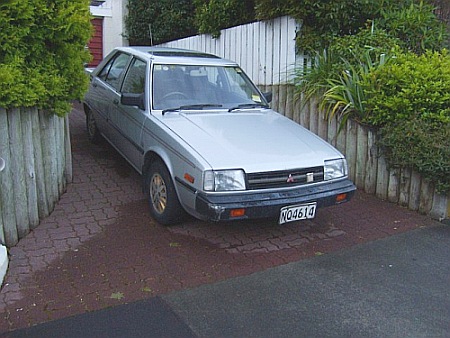
Our New Zealand friend Gavin Shoebridge has been making steady progress on turning his 1987 Mitshubishi Tredia into a full-blown (uhm, maybe not the best word) Electric Car. He’s got the green light (i.e. money) to buy batteries and most if not all of the parts are now in and ready for construction.
The best source for info on Gavin’s EV, of course, is his website: http://www.kiwiev.com/ where he not only chronicles his progress using lots of pictures and descriptive text, but he throws in ample YouTube videos which give you an up-close view into what he’s working on, as well as exposure to his lovely accent and wry humor!
Let’s take a look at some of his progress shots. As usual clicking the thumbnails opens up a larger version.

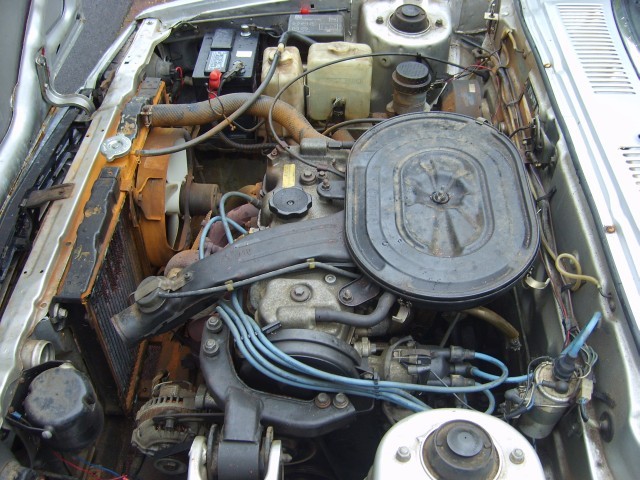
Here’s the culprit, Mr. Shoebridge, you appear to have a black hole under the hood, relentlessly sucking high priced petrol (or is it gas in NZ?) in return for merely twenty percent of that energy for the dread commute. Out with it!
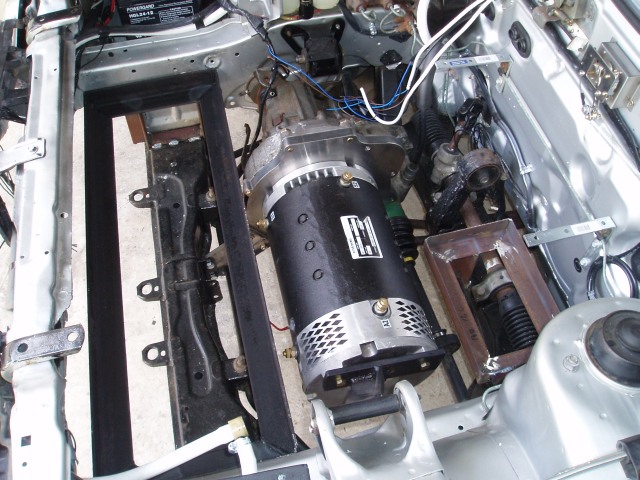
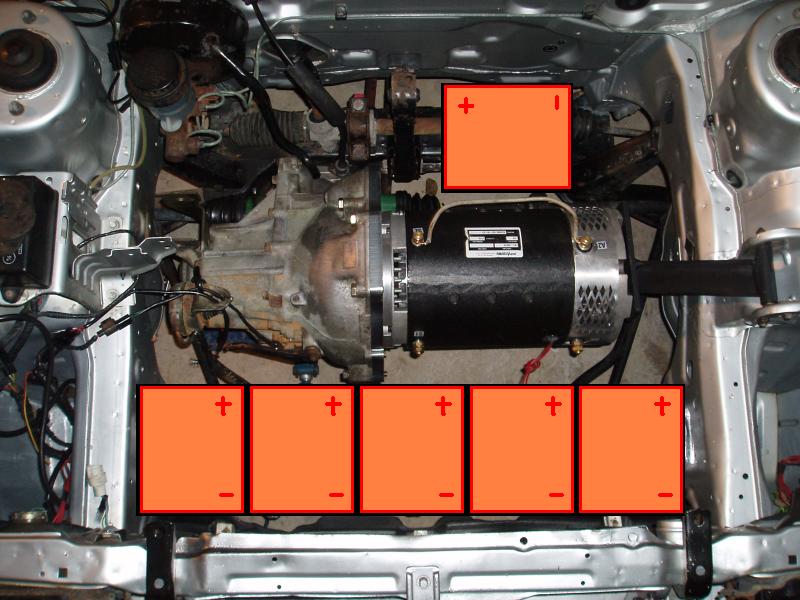
Fully liberated from the ol’ gas guzzler and sporting a new electric motor (Advanced DC FB1-4001a) it looks rather lonely in the engine compartment. This place needs a few batteries to spruce things up, along with sturdy racks to anchor them.
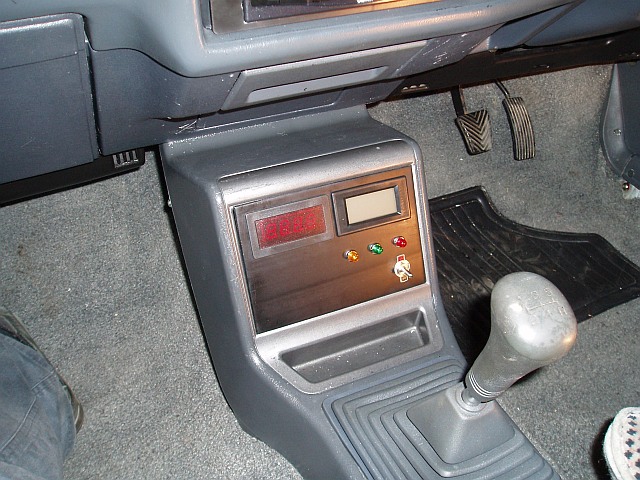
Here’s the view from the driver’s compartment. Other than this small control panel and a nifty new on/off switch on the climate control panel it looks pretty clean and neat. What you aren’t seeing is the electric heater Gavin mounted inside the dash, which I think he mounted in a very unique way (be sure to watch video).
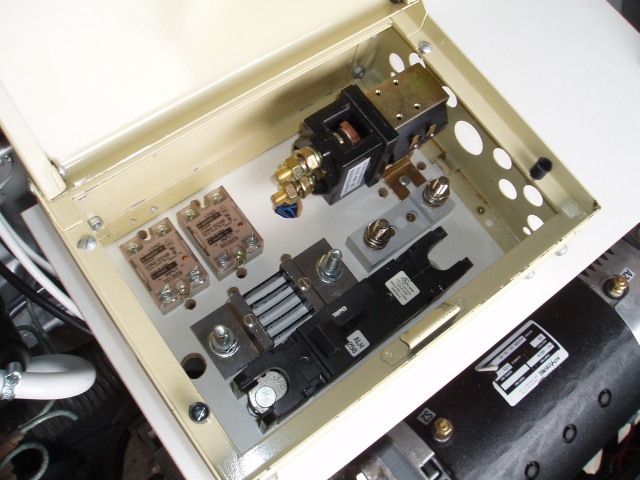
Here’s the control box. In the upper left are solid state relays (KSI and heater control, great idea!), a traditional mechanical relay for the high voltage, high current use, along with a current shunt, main fuse, and circuit breaker. It’ll be a bit cramp once there’s some wiring running in and throughout, but the nice thing is all of it is enclosed and protected from the elements (and curious fingers).
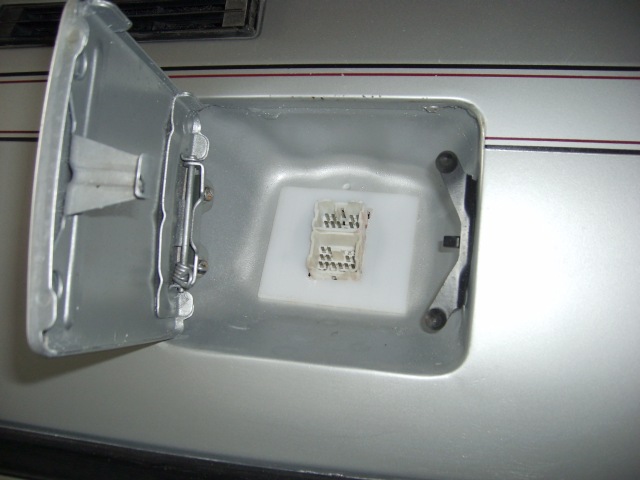
When you show someone your EV the first and most dramatic step is to pop open the “gas” cap to reveal an electric jack or plug. That’s when they know you are serious and it never fails to surprise most folks: “Whoa, you mean NO gas?” That’s when you pop open the hood and really blow their mind…
This section talks about the off-board charger setup that he’s going to use.
It’s all looking great and I can’t wait to see the battery and controller wiring go into place next. Thanks to Gavin for sharing his EV progress, both on his site and in the comments here.

Hi Gavin
I installed my heater in exactly the same way. I cut a rectangular hole in the old copper matrix and glued in the new heater with polyester resin “Plastic Padding” “Chemical Metal”. The wires now come out of the holes where the matrix pipes used to be.
The 120V heater isn’t very effective on 96V. I wish I had glued 2 in there or used a lower voltage model.
It looks like a lovely neat job you are doing!
Thanks James! And thank you Jerry! Very nicely done.
I’m off to call my battery supplier now. It’s finally time to get those batteries.
:)
Hey folks,
Does anyone know what a schematic diagram with the High Pedal Lockout included would look like?
I have the contactor working great but can’t figure out how the High Pedal Lockout joins into the circuit.
Anyone have a diagram, picture or can explain how to wire up the High Pedal Lockout?
No need to panic!
I just heard back from EVA and the High Pedal Lockout is a function built into the Curtis controller.
It’s not something I need to physically install myself. Phew.
Hope that helps anyone else with the same problem some day!
I’m afraid there may be some confusion going on here.
The Curtis does have sort of a high pedal lockout that protects you if the pot were to fail and go beyond full throttle. It also prevents you from taking off if you were to depress the pedal before turning the key.
However, this doesn’t help you if the Curtis were to fail closed circuit, which has been known to happen.
To protect against this most DC motor based EVs use an external high pedal lockout that drops the main contactor when you take your foot off the accelerator.
Usually there’s a micro switch on the potbox that closes or opens when the pedal is high. Wire this to drive a relay that interrupts the coil circuit on the main contactor.
Here’s a wiring diagram.
http://www.evconvert.com/eve/schematic-update
And don’t forget the precharge circuit…
Thanks for that Peter.
I’ve got it set up as you suggested at the moment; as soon as your foot is taken off the gas pedal the contactor pops open.
Hey, Gav! Good to see you have the Treddie on the road (kinda). Now you just have the paperwork to do… haha
Hey,
Way to go Gav. Saw your video of the first test drive. Sweet. JJ
Thanks everyone!
It was a little illegal but had to be done. ;)
Found some teething issues I need to fix too. So far so good though.