

Smoke Test · 26 November 05
The dash wiring project was finished off this week. After a nice Thanksgiving dinner and a day off I headed into the garage to do a smoke test.
A guy I worked with once explained that electronic devices all work on smoke. At the factory they put smoke into all of the components and as long as you don’t let the smoke out everything is happy. Screw up and let the smoke out and your electronics quit working.
After removing what seems like a few miles of wire from Eve it was time to see if anything works.
And if any smoke comes out…
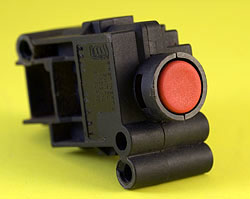
The image is an Inertia switch from First Technology out of the UK. They have some cool products: mini crash sensors, accelerometers, occupant thermal imaging, solar and twilight sensors, and of course fuel cut-off switches like this.
An inertia or fuel cut-off switch has something like a weighted ball inside. If you slam it hard enough it unlatches the switch, turning it off. You push the red button to reset it. These guys also made the inertia switch I bought for the first EV.
Ok, back to wiring. First let’s set the stage.
Once again we’ll use our standard issue ZMU as a reference of scale.
I’ve also added a glowing magnifying glass to images that can be clicked on for a larger version. Be sure to click them, as the small pics often only show part of the full image.
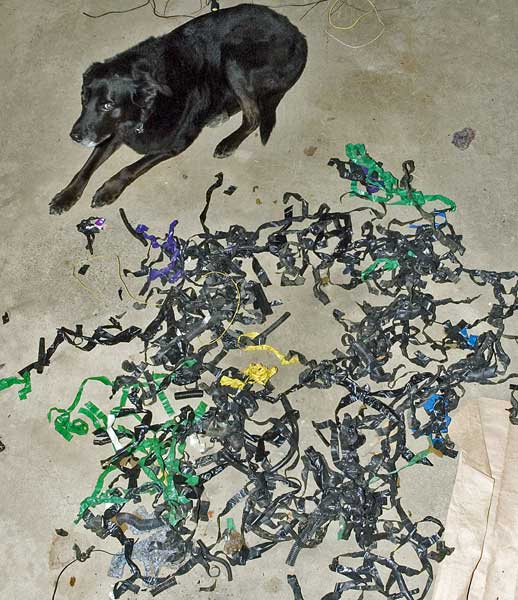
This is most of the electrical tape that has been removed. There’s a few odd insulators and connectors in the pile but for the most part that is all tape.
Most nights working on the car would find me pulling stray lengths of tape from my boots and cursing. Now that I’ve documented the mess I get to throw it out for good.
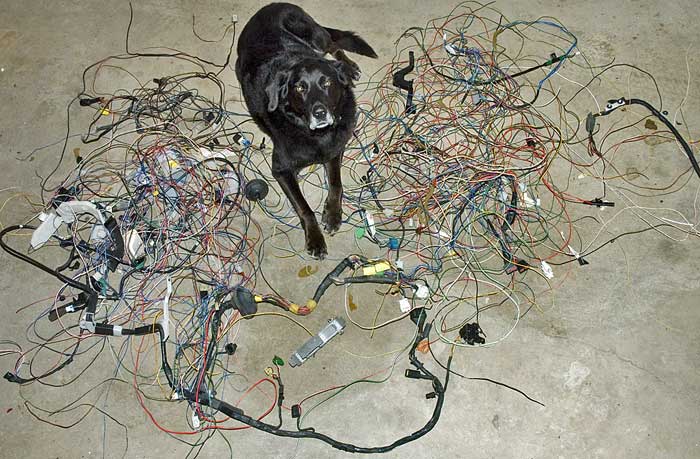
Here’s the real story folks…
If I were really motivated I’d measure all of this wire so we could say something like:
Removed enough wire to reach 1/1000th of the way to the moon!
The total wire length is equal to 20 small intestines stretched to full length!
Instead I’ll borrow the office scale and update the tally in pounds later on.
Percentage wise I’d say at least 50% of the wire is engine and engine control related. Another large chunk came from the factory stereo gear and the passive restrain stuff.
While cleaning up the dash wiring I ran across another interesting connector and added it to the Car Connections page.
You are probably biting your nails in anticipation of what happened when I applied power, right?
Here you go: it worked!
Well, mostly.
To get ready for the smoke test I checked all of the wires, plugged in the cables and connectors and double checked that no power wires were laying on the chassis. Also went around and connected the various ground harnesses to the frame.
Hauled the battery back into the engine compartment, hooked up ground, and then briefly touched the positive lead to the battery.
The front of the car started moving and I nearly peed my pants!
Seems that the motor-driven headlights have a safety feature to automatically cycle if they aren’t closed all of the way. I had played around with it a while ago, moving the gear by hand to see the light lift up. When the battery was hooked up the motor swung into life, opened the light the whole way and then promptly motored it shut with a slam.
Heh, heh, no problem. I have health insurance…

So, headlamps worked right off the bat. Nothing else though.
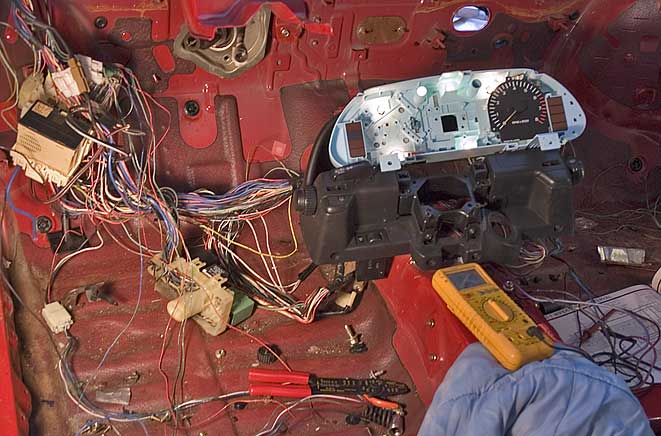
This is because I removed the ignition switch, which means that three huge wires need to be connected to the battery by hand in order to power the other circuits. The next article will go into ignition setup a little more.
Once those wires were hooked up the turn signals started working. The adjustable instrument lighting also works. Speedometer and tach will need to be hooked up later, but I’m not too worried about them.
The wiper was the only thing left to figure out. Turns out the relay in the engine compartment had lost a ground wire in a zeal of wire snipping. Wired that back up, hook up the big blue wire up front and we have happy flappy wipers.
No smoke!
Now to start taping the wire bundles back together and thinking about putting some of the dash back. Before doing that I’ll need to get the heater core wired up and figure out some kind of on/off switch.

Nice info. Good to hear things worked. I loved the light box effects and pictures from “Eye-Candy”. Cheers, -Drew
Thanks, Drew.
I’m really glad things worked too…there’s theory and then there’s actually seeing it work.
So this means you have an extra inertia switch?
I’d love to give it a home!
:-)
Jay
Hey Jay, you’ve got mail!
I’m converting (after years of contemplation) a 93 Ford Escort. I’ve just had a baby and am handing off the heavy stuff to a garage mechanic to pull out all of the unnecessaries. Do you have a complete list of extraneous stuff to be removed?
Hi Lisa,
Sounds like a fun project and a good approach. I’ve suggested folks check with the local high school shop class and see if they are interested in doing the removal.
I don’t have a complete list at the moment, and it will vary by car and your needs, but will try to put one together in the next week.
Have you considered fabricating a simple Aluminum dash?
I haven’t given it much thought yet, although it is kind of tempting what with all of the steel in the existing dash.
I’d like to keep the existing ductwork, or at least the defrost and floor level output.
There’s also the aesthetics…it should look decent. Would I be able to pull that off with my own homebrewed dash? (and finish this project some day)
Do you have any links to examples?
Probably a little late in the game for this but have you considered bundling the wires using nylon wire ties instead of electrical tape? The trick is to leave some slack in between ties until you’re 99.5% of the way finished. This way, you can add (or remove) a wire without a lot of work. Also, you can cut a wire tie or two if necessary to reroute wires or whatever. Just a thought.
This tip might be a little late for you, and maybe on the wrong page….
When disconnecting the wire harness, use masking tape and write what it hooked in to. Later, after everything is removed and all you have is the wiring harness, you can actually seperate the useless wires from the ones you need to keep. Would cut the wire seperation time to a minimum, but would add to the disassembly time. But there is another reason I suggest this method, if you are colorblind, then you won’t get as confused. :P I know from experience since I am partially colorblind.
Maybe next time you can impliment that idea?
btw- I like your site and find it informative.
Thanks Scott. I usually start off labeling everything, but as the hours wear on the patience dwindles and so do the labels. ”:^)